
BDD in .NET 8 using Specflow

So what is BDD really?
TLDR : it’s a testing process which uses a domain-specific-language (DSL) to express and then validate the behaviour of the system.
DDD fanboys will tell you that BDD is actually a refinement of Test Driven Development as it takes the practices of TDD and adds there ideas from DDD… Now how much of that is true remains to be seen.
In my eyes the biggest advantage over other practices is that DSL, which if done right can be understood by everyone on the team. But the DSL is also a double edged sword.
An example of what we are going to build today will look like this:
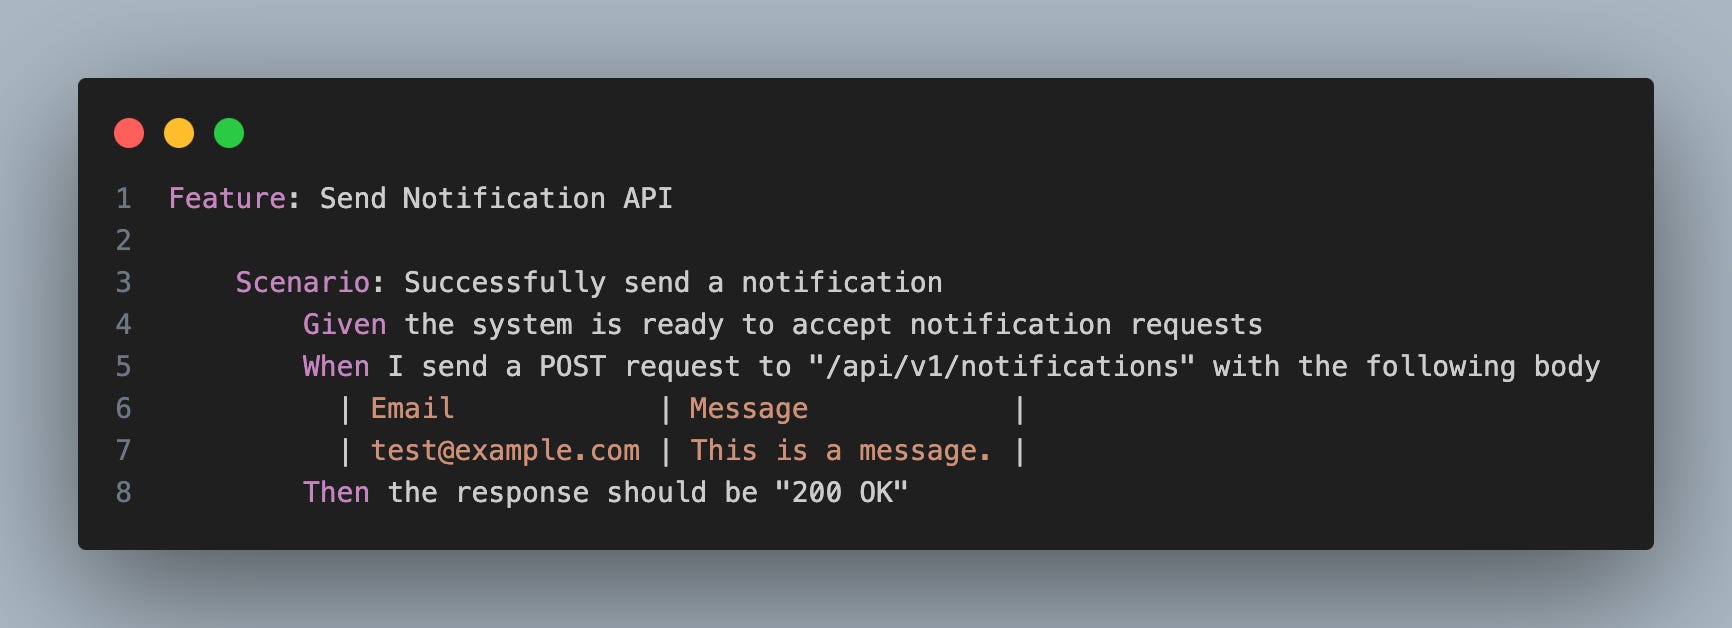
That said this is somewhat of a technical description… nonetheless it shows what can be achieved so let’s go on.
Tools we are going to use
Specflow.
In .net we have a couple of BDD frameworks, the one we will use today is called Specflow. In my opinion it’s the most mature of the ones out there and is actually the more popular one.
Gherkin
Specflow works with Gherkin specification to define the test scenarios to test our features. Here is another example of a Gherkin scenario:
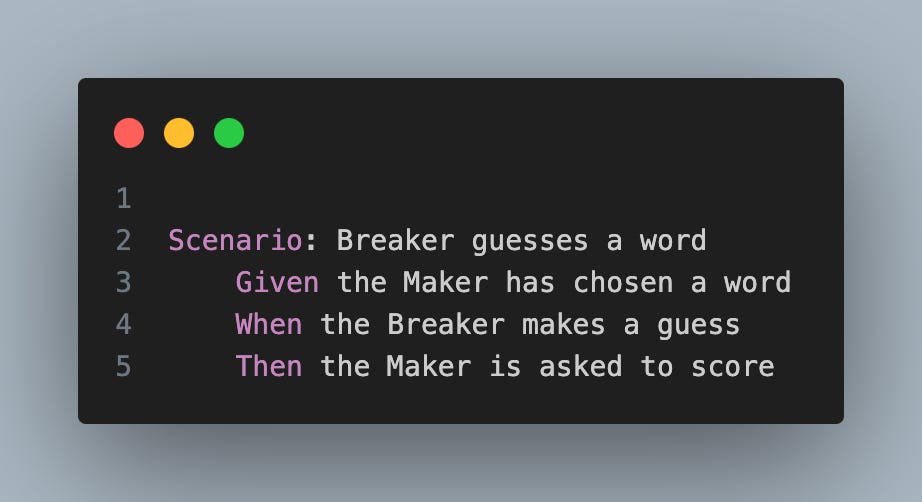
The scenarios have the following constructs:
Given : describing the startup context
When : describes the action made by the user from the initial context
Then : describes the expected behavior following the action made by the user
And : Will add a condition to any of the Given , When or Then
But : Excludes a condition at Given , When or Then
.NET 8
We are going to use the Notifications API that we developed in a previous newsletter post.
Getting the hands dirty
Note: if you haven’t read the newsletter from the very start, I highly urge you to do so :) or at least skim through the integration/subcutaneous posts as they will help you a lot here.
To get started with Specflow you will have to install the specific IDE extension
Rider:https://plugins.jetbrains.com/plugin/15957-specflow-for-rider
Visual Studio: https://marketplace.visualstudio.com/items?itemName=TechTalkSpecFlowTeam.SpecFlowForVisualStudio2022
VS Code (you guys are in for pain) : https://docs.specflow.org/projects/specflow/en/latest/vscode/vscode-specflow.html
Once you have the extension you will see a new type of project that you can add:
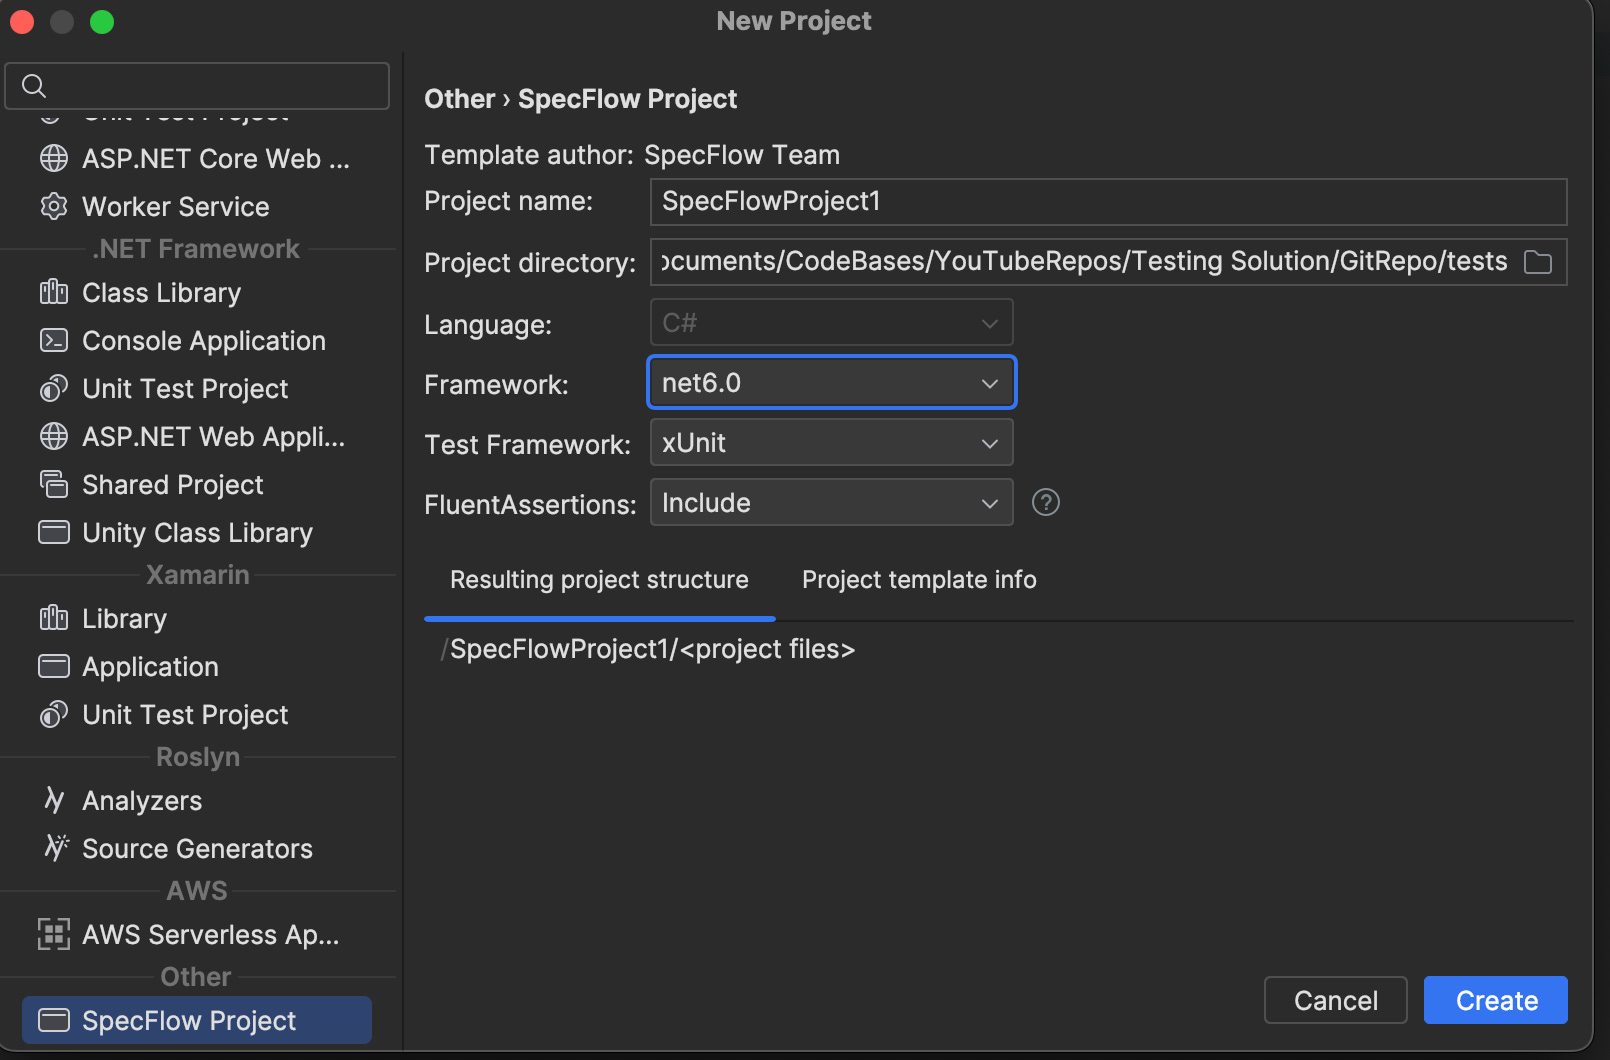
Add one with the naming that we already defined Notifications.Tests.Behavior and xUnit test framework.
Next navigate to the .csproj and update the .net version to 8 :) or stay with version 6 if that’s what you fancy (tho mind the end of support timelines).
The template itself comes with the following structure and some code snippets.

You can go ahead and remove the code snippets, but keep the structure for a bit longer.
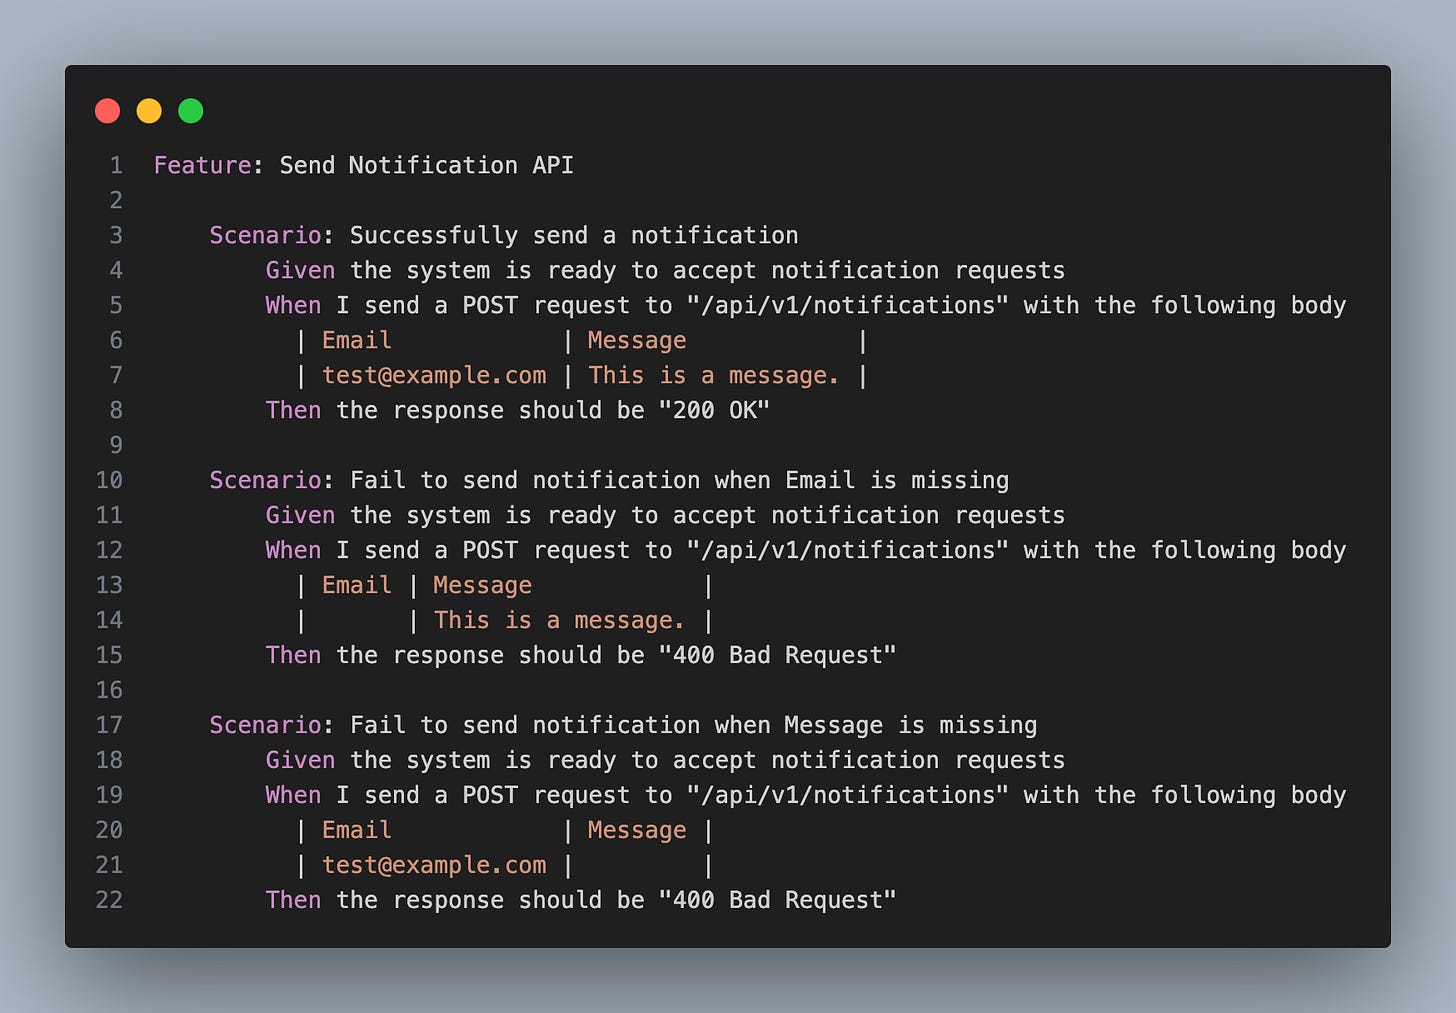
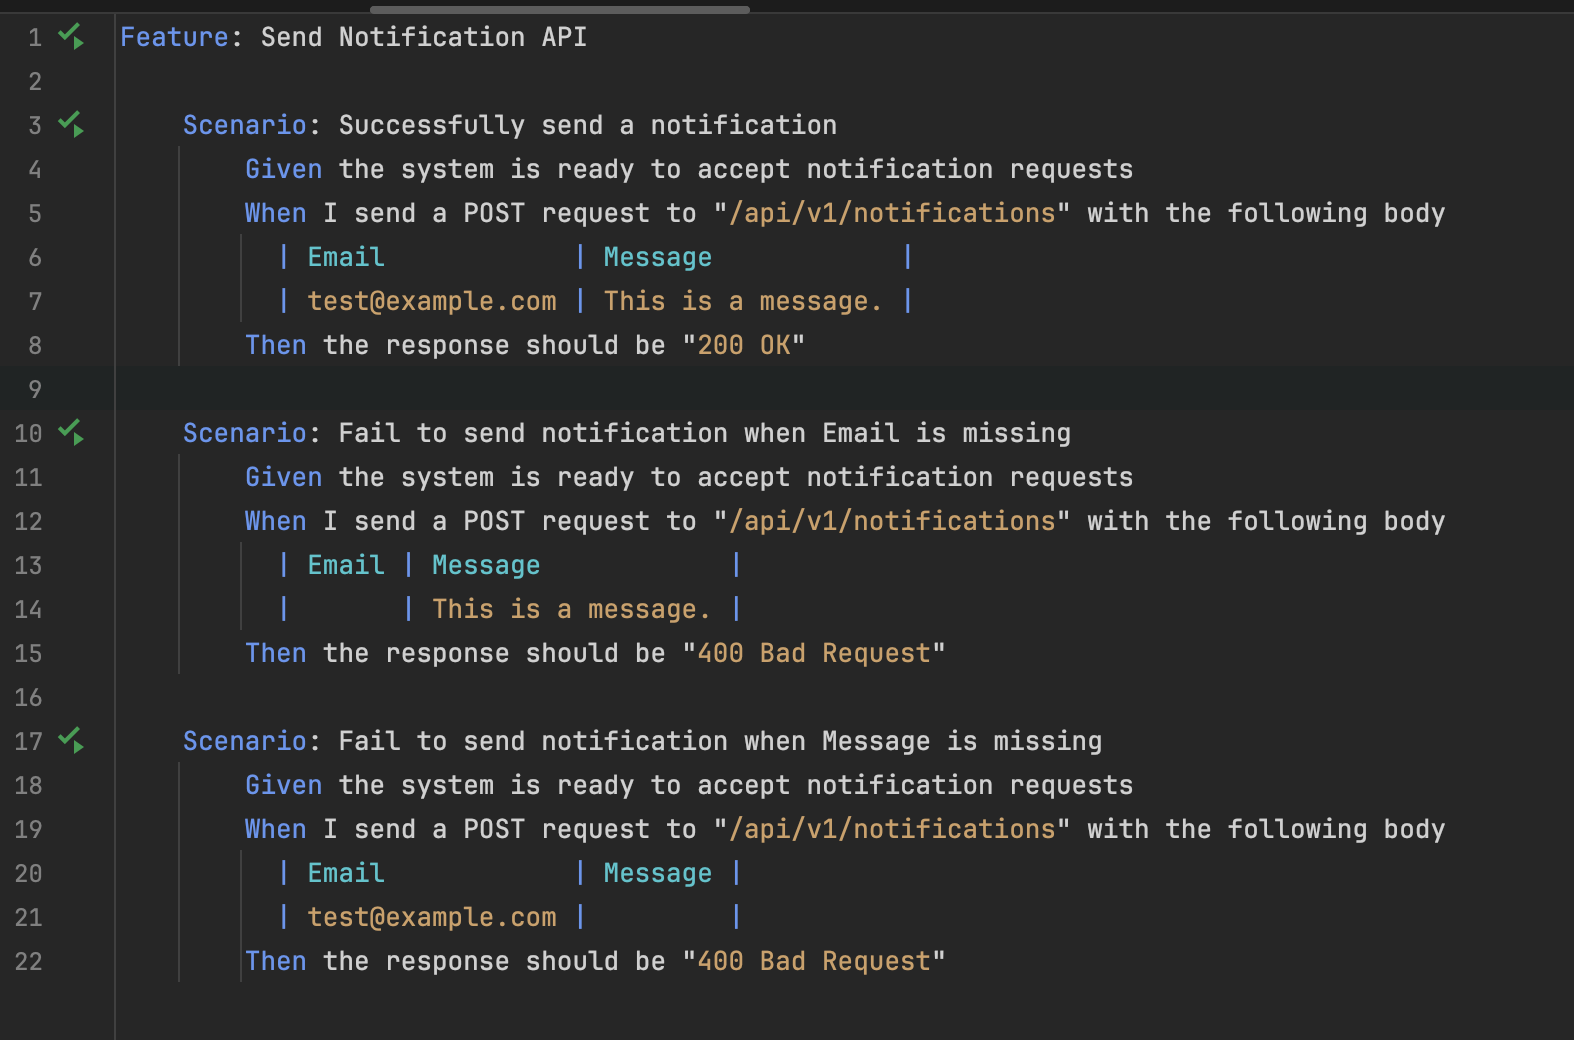
The feature folder is where we are going to have our Gherkin files. In our case the Feature file will have the following test scenarios:
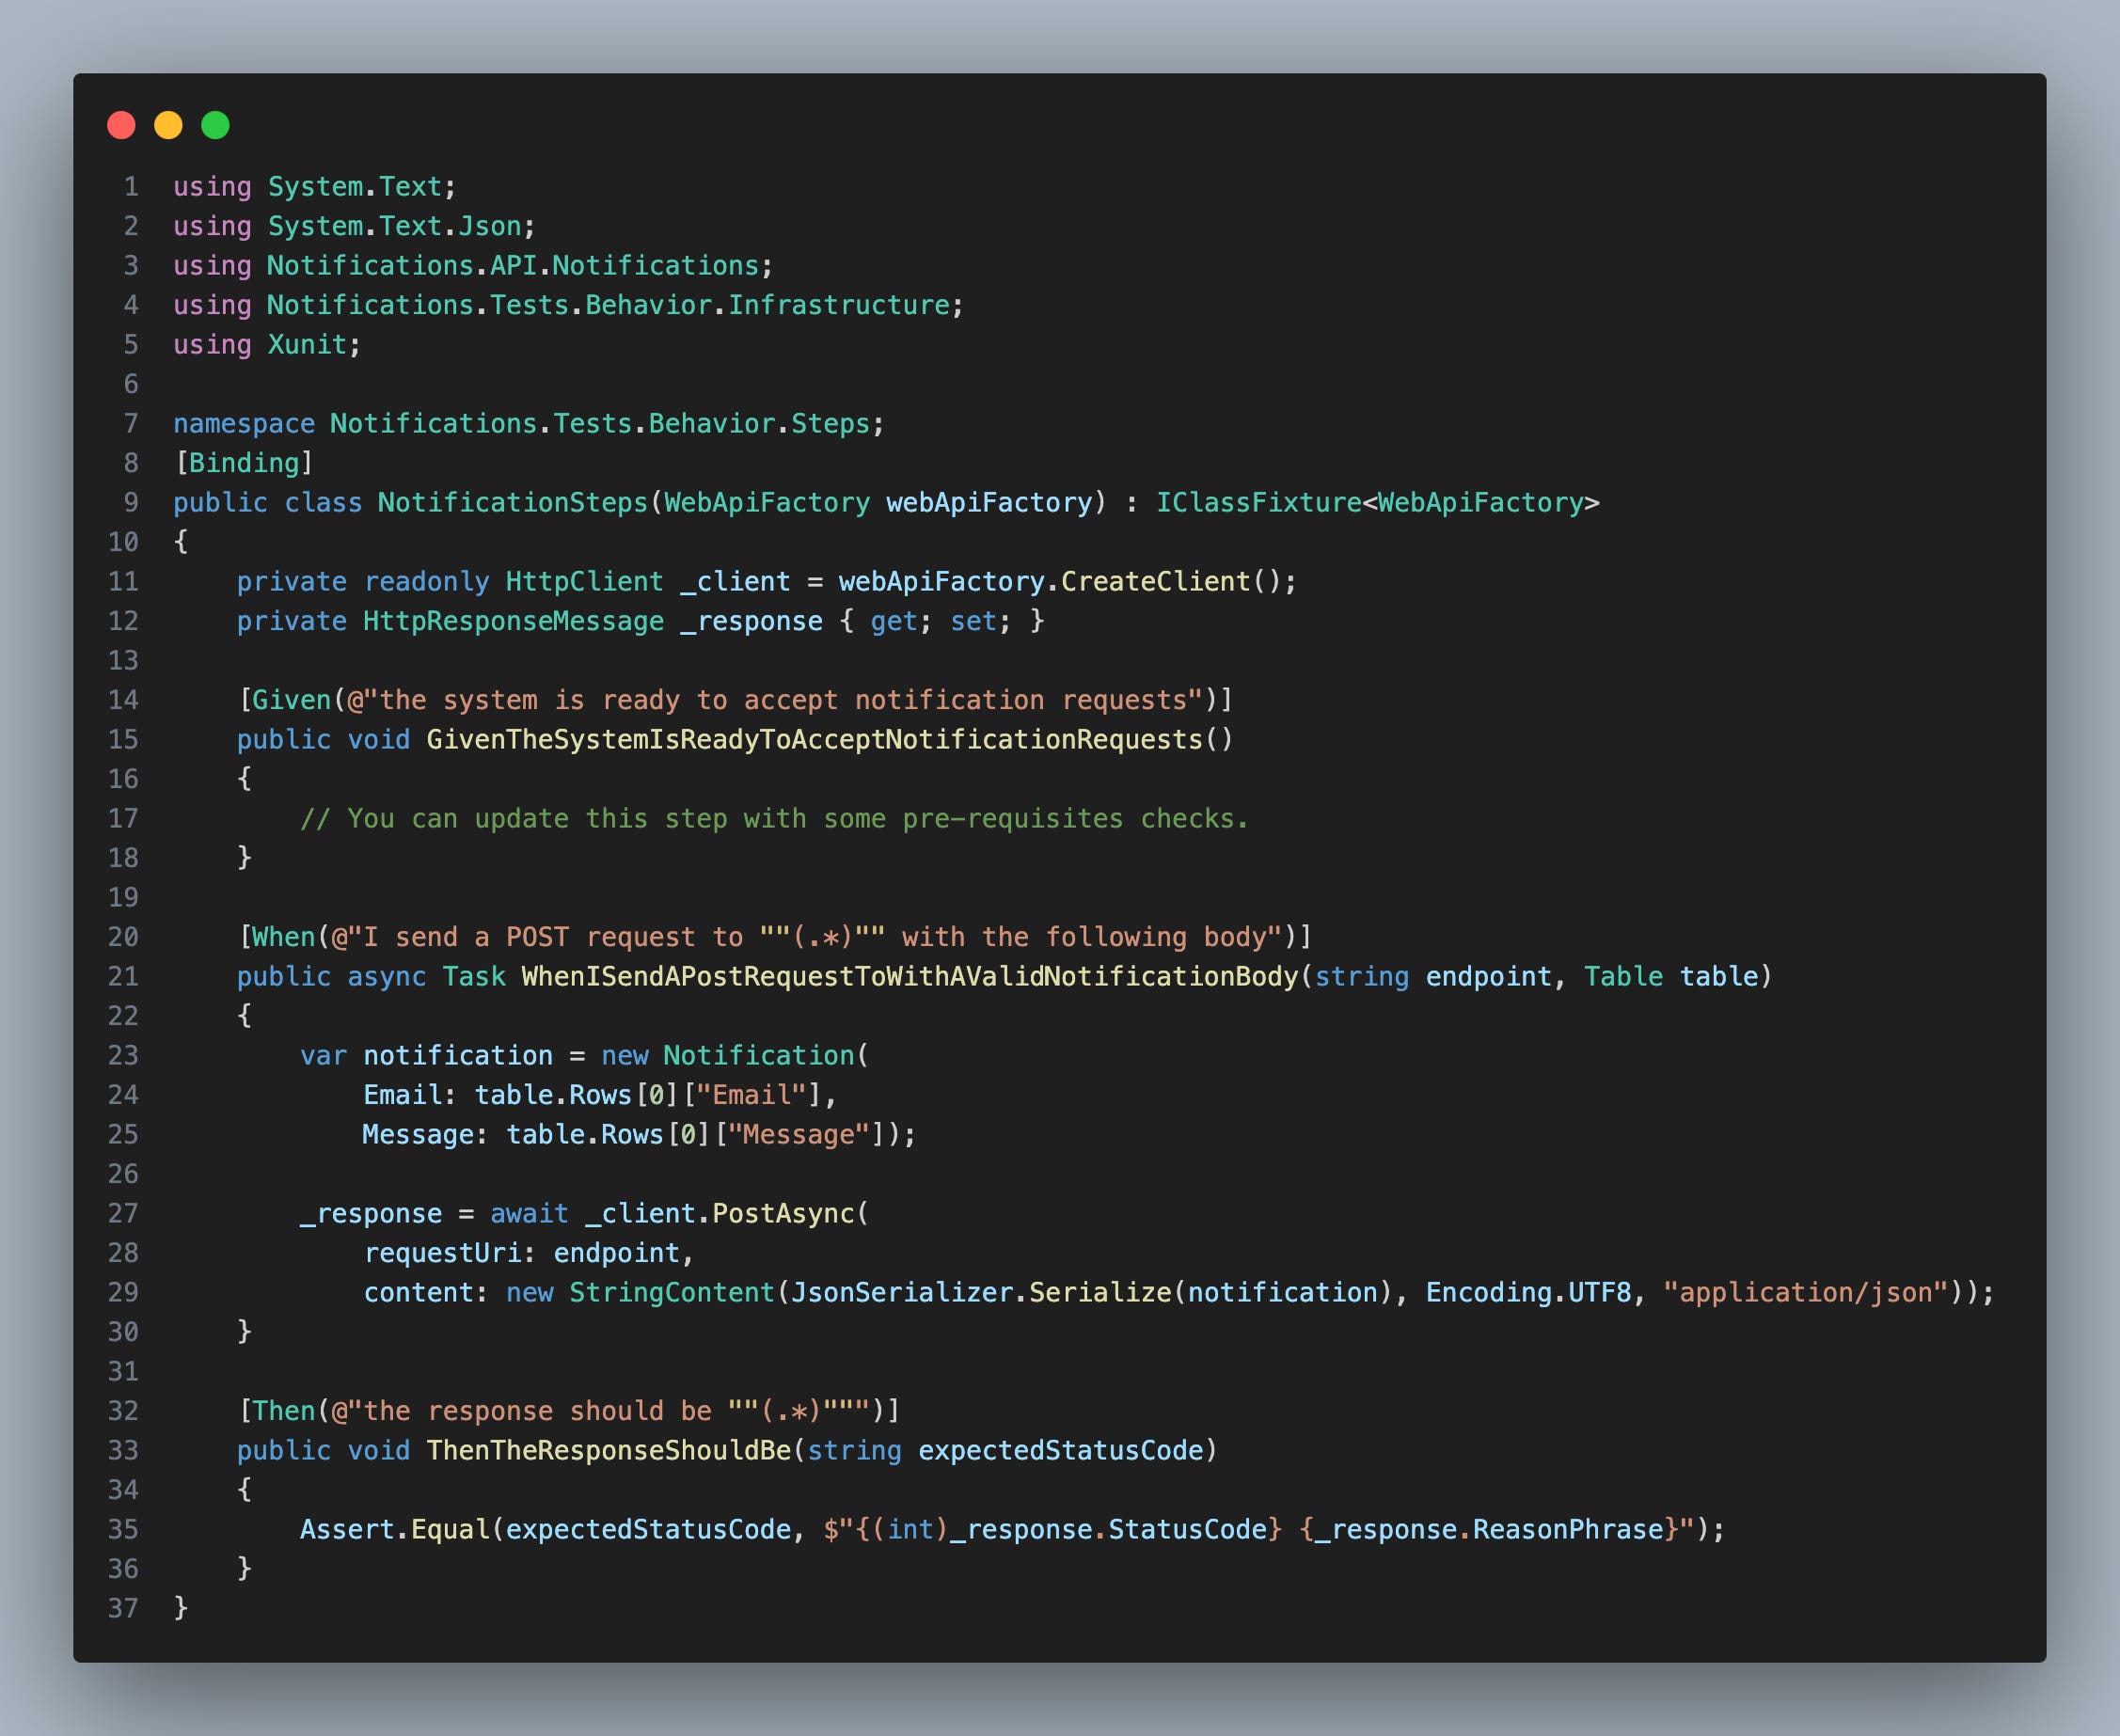
Now how the hell will this translate to a test that xUnit can run? For that we need to add a set of test steps.
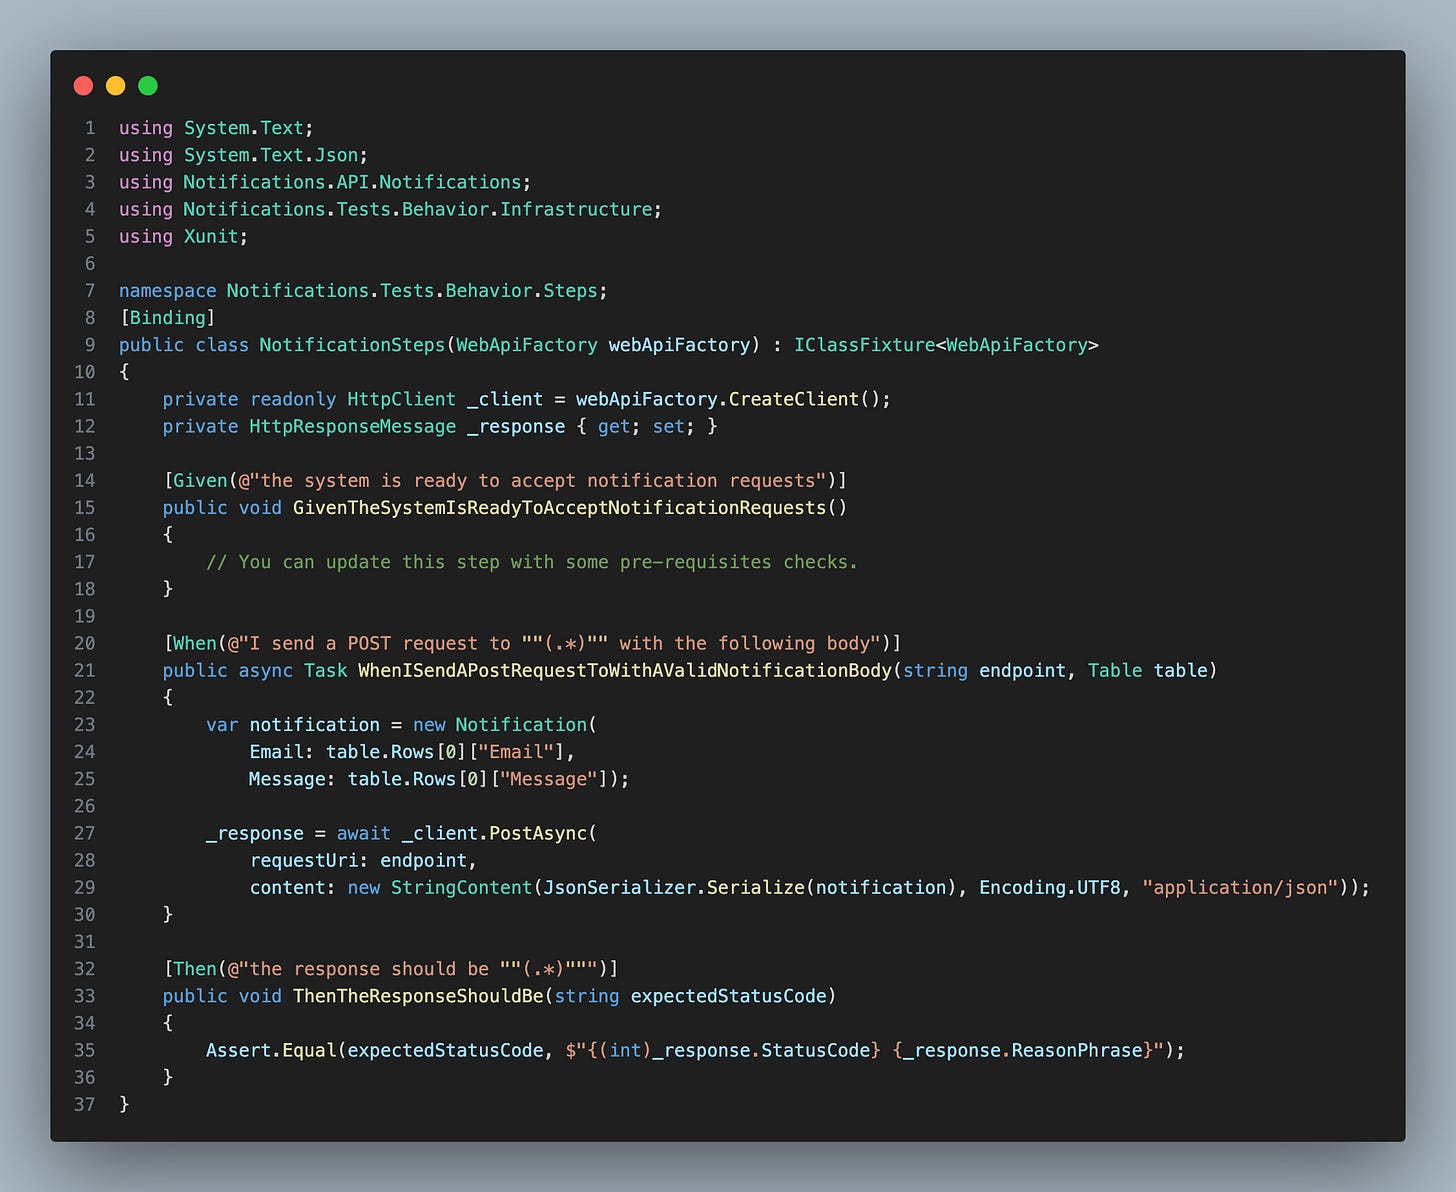
TLDR: you will have to define the steps that will map with the DSL that you use in your Gherkin files. In cases where you need to access specific data from tables from the Gherkin files you can use the Table api that specflow offers.
Take note how the NotificationsSteps inherit from the xUnit’s IClassFixture in order to reuse the WebApiFactory across the tests.
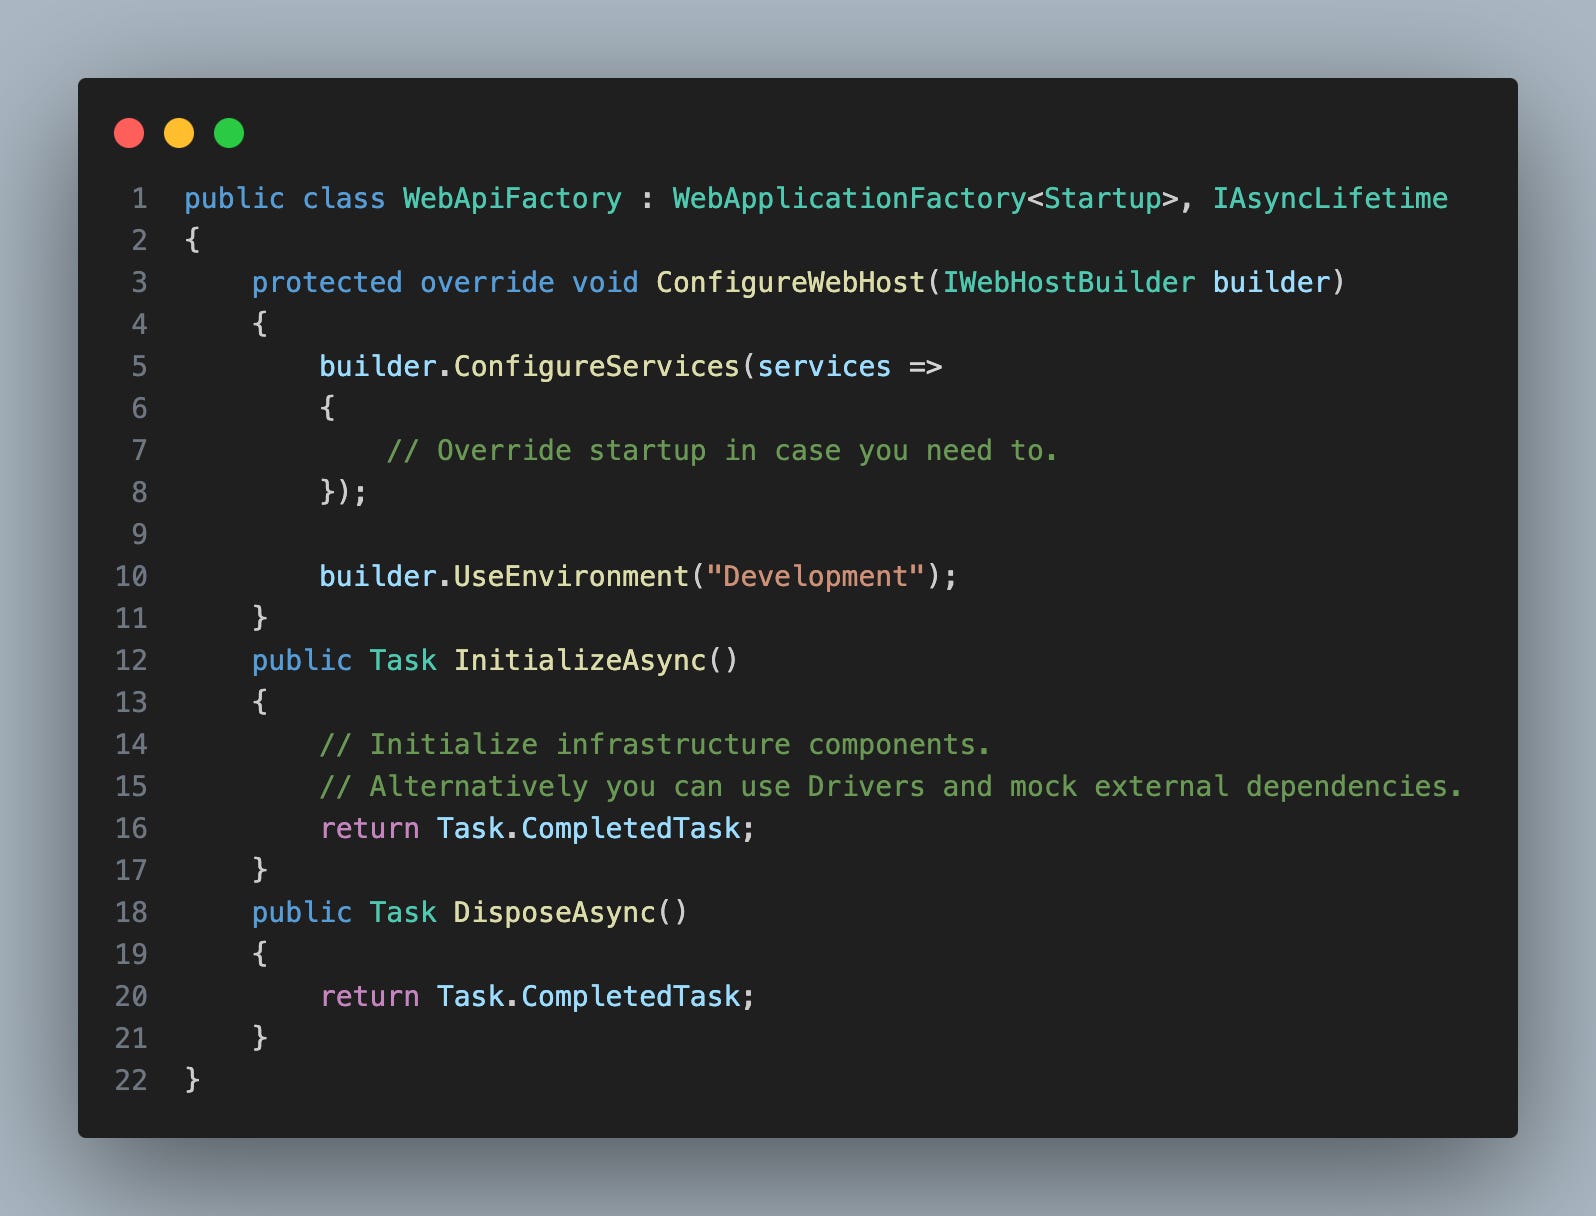
As you can see we are actually running an instance of the WebApi in the background using the WebApplicationFactory construct that we covered previously in the newsletter during the Integration/Subcutaneous tests setup. For it I prefer having an Infrastructure folder added to the test project and have it in there. This is how it could look (as a refresher) :

With all that in place you can go back to the feature specification and run the tests from there.

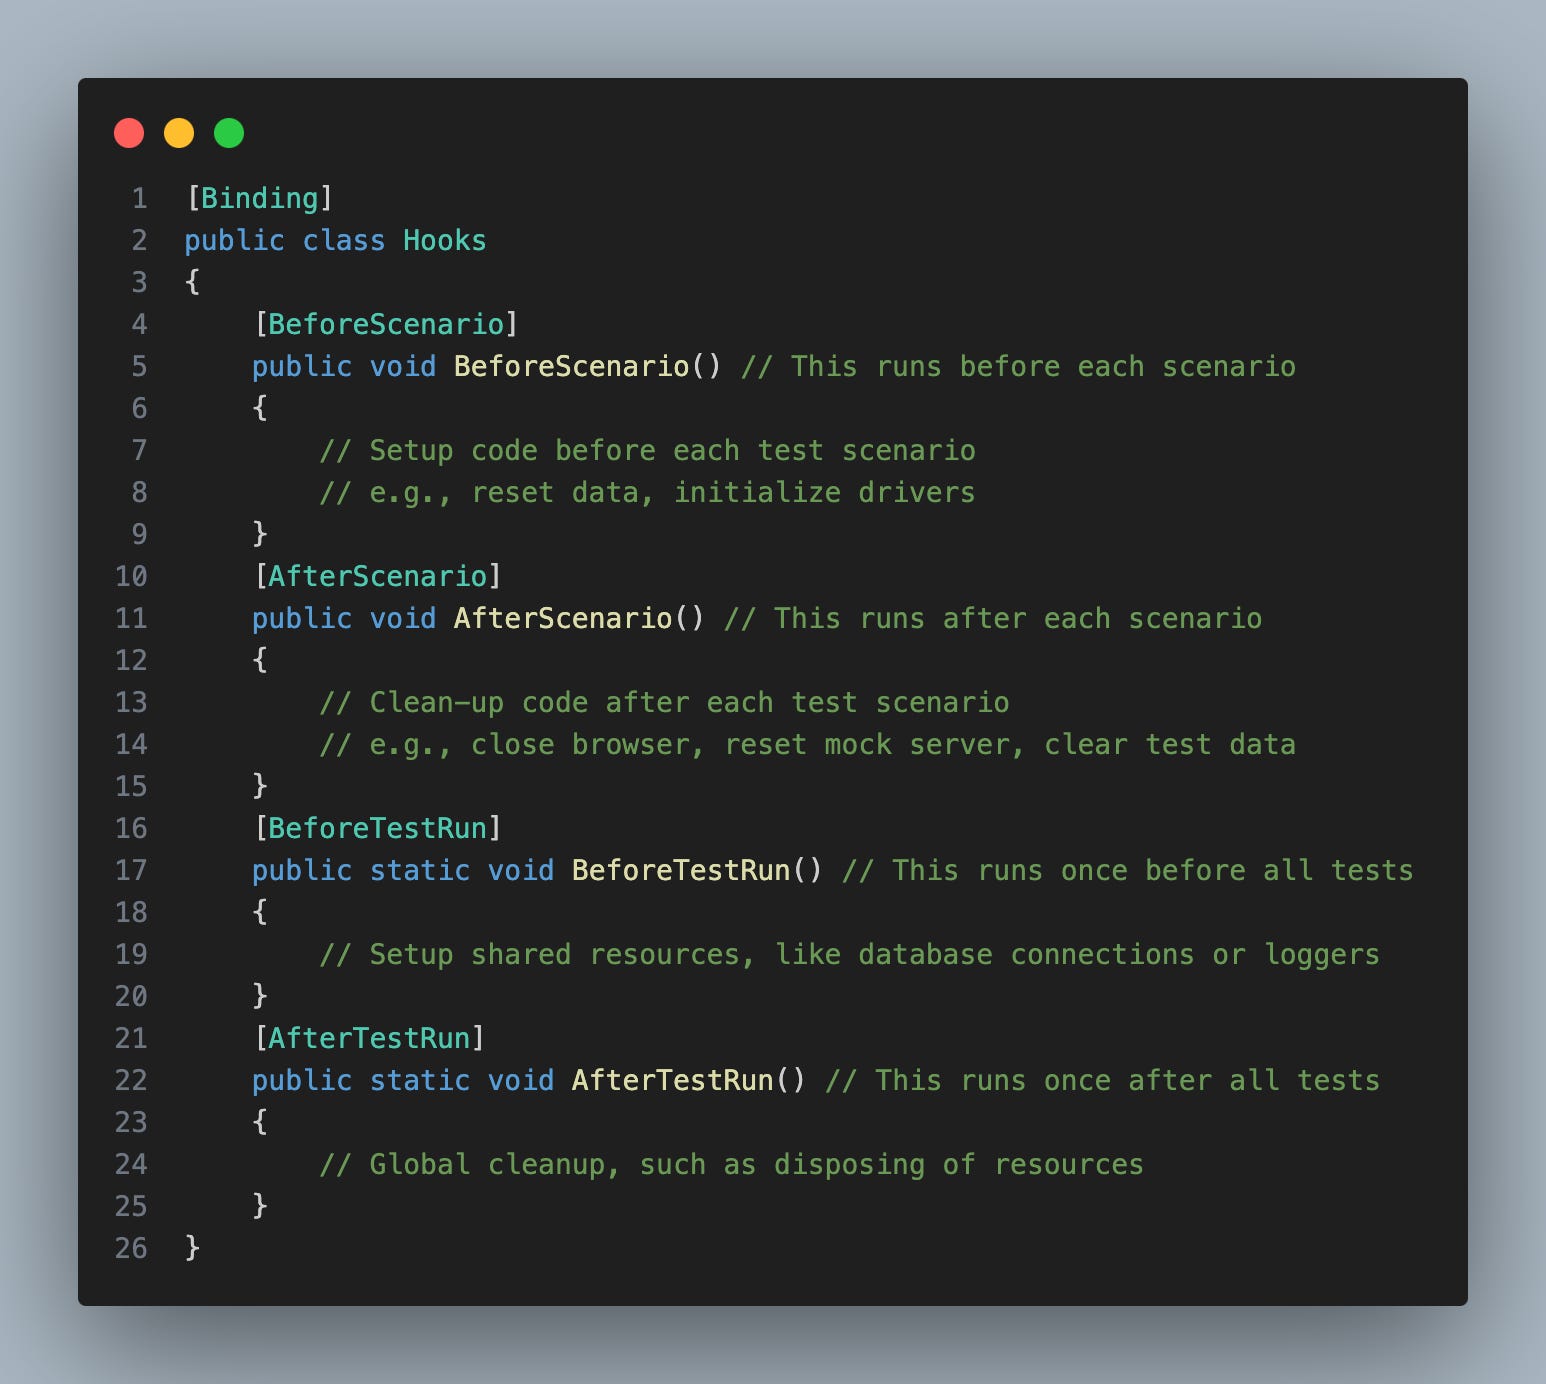
Side note about Hooks, which actually are methods that run at specific points in the test execution lifecycle. They allow you to define setup or teardown actions for your tests. Some code will make it easier to understand what is going on:

Side note about Drivers. I haven’t used them much in my life. The only times we had to resort to them was to mock some external dependency of sorts, like how we did with WireMock before.


Summing it all up
This should be enough for a simple example that includes all the basic components of BDD and SpecFlow. There is of course a fair bit more to specflow that what I’ve shown here… so if the post gets more traction I might cover those next.
All that said, I have to mention the following:
The whole idea of automated testing is to an effective way to ensure quality in the software you produce.
If you have the correct environment and this approach brings value in communicating with non-technical people like BA’s or PO’s then this might work for you.
If you cannot bring out the value of BDD, for the love of god and spaghetti, work with what works best for you. There is nothing shameful in traditional “boring” testing practices if those help you achieve quality.
Next steps
If you liked this kind of content/tutorial I will be really grateful if you cloud share it among your colleagues and friends in order to grow the newsletter further.
Heads up:
Subscribe to the YouTube channel where I cover a wide array of .NET related topics.
Earlier this year I release an entire course around the topic of building a Modular Monolith system that you can find clicking here : Microservices Ready Architecture
Become a Patreon and get access to the source code presented in the newsletters and YouTube channel.
And with that cya next time :-)